Showing posts with label Crafting. Show all posts

11.18.2013

Pom Pom Garland


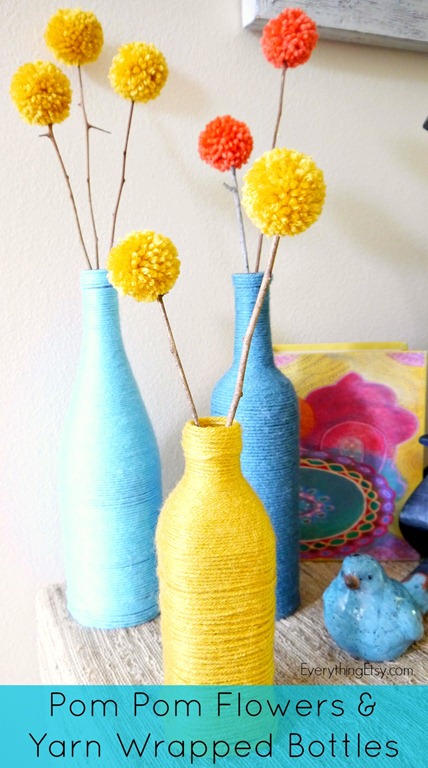
Pom poms just might become my go-to DIY decor for a bit. With only a pair of scissors, a little bit of yarn, and a few spare minutes, you can make a few pom poms. This simple style garland could be used for any celebration or holiday!

Materials
yarn
scissors
twine, yarn, ribbon, etc. (for garland)


Begin with some yarn. These two small leftover balls were enough for 4 small pom poms.


Secure the end of the yarn between your thumb and your hand, leaving tail approximately 1-2" long.


Begin wrapping around two, three, or four fingers (depending on how large you want your pom pom). 


Wrap at least 100 times, more if you like them fuller.


Cut the yarn from the ball/skein, and then cut a piece of yarn a few inches in length. Remove the yarn from your fingers, and slip the single strand of yarn through the middle.


Secure as tight as possible and tie a double knot.


Slide your scissors through the loops and snip them all. You will end up with a scraggly looking pom pom. 


Trim the ends until you are satisfied with the shape.


Tie to a long piece of yarn, twine, ribbon, or other material of choice to create your garland, and enjoy!


Here are a few of my favorite other pom pom uses from Pinterest.


{via}
{via}


{via}

Have you ever made pom poms for decor?
What's your favorite way to use a pom pom?

+, Lauren Aiken


11.01.2013

A Pat the Bunny Birthday Party

Last Saturday we celebrated Nora's 1st birthday at our house. Most of our extended family was able to make it, with the exception of Auntie V (we missed you!!). We started the morning with a family brunch, Nora opened her gifts, and then we had a few friends over for cake! 

I wanted to make Nora's party special but also wanted to keep a really small budget. Turning one is a big deal! There is much to celebrate in Nora's first year or life, and she is blessed to have many people who love her dearly. At the same time, the party is a fleeting moment - and one she will not remember. 

Since I'm terrible at making decisions, it always helps me to make a list of priorities. 

These were my goals for her party:

  1. Everyone has fun and our family shares a meal together. Our families came over mid-morning for brunch. The menu included baked eggs, hash brown casserole, ham, croissants, banana bread, and a yogurt parfait bar. A few friends came over in the afternoon for dessert, and Nora got to share her new toys with her friends :).
  2. A theme that represents Nora at this stage of life. I really wanted to choose something that represented Nora's current likes and interests. Pat the Bunny turned out to be absolutely perfect! Nora loves reading books, she has been really into the touch and feel books, and just in the last month started loving on her stuffed animals. Plus, Pat the Bunny was a classic in our house growing up, and my mom had kept my stuffed white bunny (I didn't know until after I settled on the theme). 
  3. Pretty photos to remember the day. Cue the DIY projects! Just a few little details can make for some pretty photos. I spray painted a couple Goodwilled frames and gathered a couple others from around our house, made a pom pom banner with old yarn, and another simple banner with Nora's name for our mantle. I used this tutorial for the tissue paper banner. It took only 3 pieces of tissue paper and about 20 minutes tops! The cake toppers are handmade too.
  4. Something handmade to keep. I ended up making Nora's dress, mainly because I had something in mind and couldn't find anything close to what I was looking for in stores. It ended up being my favorite thing about her party even though it was too big for her. It's one of those simple pillowcase dresses that you see all over Pinterest. Instead of cinching the neckline, I added honeycomb smocking on the front and back. I watched a youtube tutorial for the smocking (it's actually very simple) and looked at about 4 different tutorials for the dress and did my own thing. 
Nora's party turned out just how I envisioned, which doesn't happen often. It was such a joy filled day, and we are so thankful for everyone who came to celebrate with us! I had been sick for a couple weeks and had also found out I had strep throat just a couple days before the party. By God's grace, a few people helped me with some last minute things, everything got done, and I was running on enough adrenaline Saturday morning that I felt well for most of the day. 

Ok, enough talking about the party, here are the photos of the day!


my sweet one year old! 


4 generations, with Grannie Weir


Nora's aunts and uncles (minus Victoria)


Daddy and Mommy 


Grammy and Gramps


Grandma and Grandaddy 


a little more decor


showing off her new walking skills


and of course a photo shoot


the brunch spread (ignore the red room, please)


 opening gifts 


playing with friends


and the CAKE!! 


We had the best time celebrating YOU, sweet girl!  


+, Lauren Aiken

8.17.2012

{DIY} Contoured Changing Pad Cover


The nursery is really starting to come together now! We finally received the crib mattress, and yesterday I washed the mattress pad and sheets so now Baby A's crib is all set! I am so excited to show you everything in the nursery, but it's not quite ready for a reveal yet.

I had some fabric leftover from the crib skirt I made a few weeks ago so I decided to incorporate a little bit of it into a changing pad cover.

I found this tutorial on Pinterest but wanted to add a stripe of my accent fabric in so here is my own little tutorial.

Materials
1 yard of fabric
scrap fabric for an accent stripe (needs to be at least 33" long)
10" of 1/4" elastic
sewing machine + thread
rotary mat and cutter
scissors

Directions
You're going to end up with three pieces - one for the top and two pieces for the contoured sides.

First, you need to figure out the size your cover needs to be to fit the changing pad. Measure your changing pad from the front (4.5"), across the top (18"), and down the back side (4.5"). When you're measuring across the top, make sure that the tape measure follows the shape of the pad rather than measuring straight across. Add 3" to each side. This will allow the cover to wrap around the bottom of the pad. This totals to 33". Then, measure the width of the pad. A standard pad is 32" wide. Factor in a 1/2"seam allowance to both sides of the width. This means you will need a 33"x33" finished square piece of fabric to complete the large piece for the top.

Now we need to piece together the top. You can make the accent stripe any width you'd like, as long as it ends up being 33"x33" total. Here are the measurements I used.

3"x33" minky
12x33" accent fabric
19x33" minky

(Note: This equals 34" because we had to factor in a 1/2" seam on either side of the stripe. If you choose to use a different size stripe, make sure you factor in the 1/2" seam allowance!)

Pin right sides together and sew on either side of the stripe to make your top piece.


Next, we're going to cut the contoured pieces for the sides. Trace the edge of the changing pad. Add 3" to the bottom. Then add 1/2" around the other three sides to account for the seams. Cut your pattern out.


Trace the pattern two times and cut your sides out.


Now we are ready to put the three pieces together! Pin your sides (right sides together) to the top piece. Use as many pins as you need to because stitching around those contoured ends can be a bit tricky.


This is what it will look like when you're done.


After sewing the sides to the top piece, you can serge (or hem like I did, if you don't have a serger) around the entire perimeter of the cover. This will finish off the edges and also prevent fraying.


Next, we are going to tailor the cover to better fit the pad. Place it over the changing pad and pinch the underneath of the corners together, getting rid of excess fabric. Mark this with a pin. Before you actually make this diagonal stitch, pin right sides together!


Cut off the corner you just sewed.


Do this for all 4 corners.

Finally, sew a 2.5" piece of elastic into each corner. Be sure to pull the elastic very tight as you stitch it to the wrong side of the corner.


Slip the cover onto your changing pad, and you're all done!


I just love how the contour looks a little nicer than some of the others out there that are not so fitted.


I'd love to check out your work, so keep me posted if you make one!
Please feel free to contact me with any questions about the tutorial as well. 
+, Lauren Aiken